Transformers Cake
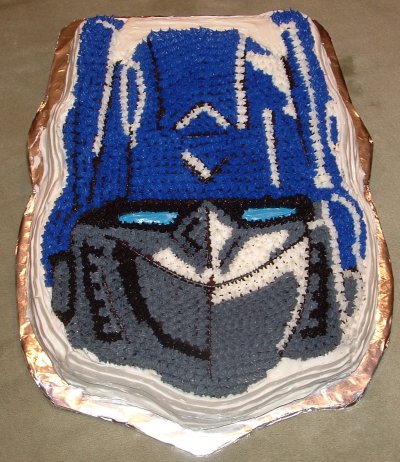 |
More than meets the eye … with this Transformers cake. It is always thrilling for me that something that I have fond memories of comes back into my life from my children’s likes. When I was growing up I remember watching transformers with my brother. Then we were so excited when we got a couple of the transformers. I still remember transforming Optimus Prime. Then with my kids we watched some of the newer movies and I couldn’t get over how cute Bumblebee was in the movie. He was so animated and innocent. When my boys asked to have a Transformer party I couldn’t resist. My ideas bounced off the idea of the transformer cake and movies. |

More than meets the eye … with this Transformers cake. It is always thrilling for me that something that I have fond memories of comes back into my life from my children’s likes. When I was growing up I remember watching transformers with my brother. Then we were so excited when we got a couple of the transformers. I still remember transforming Optimus Prime. Then with my kids we watched some of the newer movies and I couldn’t get over how cute Bumblebee was in the movie. He was so animated and innocent. When my boys asked to have a Transformer party I couldn’t resist. My ideas bounced off the idea of the transformer cake and movies.
How to Make the Ultimate Transformers Cake
|
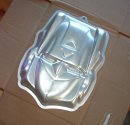
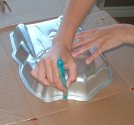
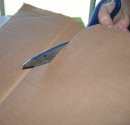
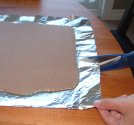
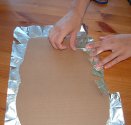
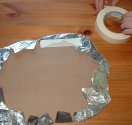
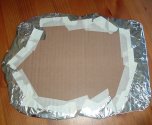
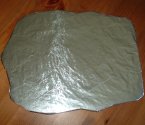
I used the Wilton Transformers cake pan to create the shape for the cake board. I used a cardboard and tinfoil trick to create a base for the cake. Trace the shape of the cake onto cardboard Then cut it out. Finally, cover it with tinfoil. When I am working on the cake I still store it in my large rectangular cake holder in the refrigerator. |
|
I used the Wilton Transformers cake pan to create the shape for the cake board. I used a cardboard and tinfoil trick to create a base for the cake. Trace the shape of the cake onto cardboard Then cut it out. Finally, cover it with tinfoil. When I am working on the cake I still store it in my large rectangular cake holder in the refrigerator.
 |
 |
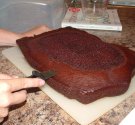
I made the cake a chocolate cake because my son loves chocolate cake and the icing is mainly dark colors. Before I put the batter in the shaped transformer cake pan I sprayed the cake pan well so when it was cooked it just slipped right out. Bake it at 350 degrees for about forty to forty five minutes. After it is baked, let it cool for ten to fifteen minutes and then level it with a serrated knife. Make sure you level it right away so that it won’t crack the cake. Then let the cake cool on a cooling rack and I placed it into the refrigerator to make the cake really cool. With the extra cake that you cut off to level, put it into a container and save it for later. It is fantastic to be able to make some cake pops. They are easier to make than you might think. Also then there is no waist.
 |
 |
 |
 |
 |
 |
|
I made the cake a chocolate cake because my son loves chocolate cake and the icing is mainly dark colors. Before I put the batter in the shaped transformer cake pan I sprayed the cake pan well so when it was cooked it just slipped right out. Bake it at 350 degrees for about forty to forty five minutes. After it is baked, let it cool for ten to fifteen minutes and then level it with a serrated knife. Make sure you level it right away so that it won’t crack the cake. Then let the cake cool on a cooling rack and I placed it into the refrigerator to make the cake really cool. With the extra cake that you cut off to level, put it into a container and save it for later. It is fantastic to be able to make some cake pops. They are easier to make than you might think. Also then there is no waist. |
|
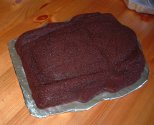
Next, I slipped waxed paper under the cake before I iced the cake. I tore small pieces (of wax paper) that were maybe about 2 inches by 4 inches. Then I iced the cake. I used the tips #3, 16 and 47. First, while icing, I iced the outside white with an angled spatula. The chocolate crumbs were mixed into the icing, but I knew I would clean that up after icing the top of the cake. Never worry, your cake creation will always turn out in the end. |
|
Next, I slipped waxed paper under the cake before I iced the cake. I tore small pieces (of wax paper) that were maybe about 2 inches by 4 inches. Then I iced the cake. I used the tips #3, 16 and 47. First, while icing, I iced the outside white with an angled spatula. The chocolate crumbs were mixed into the icing, but I knew I would clean that up after icing the top of the cake. Never worry, your cake creation will always turn out in the end.
 |
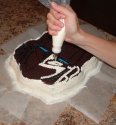 |
I used the round icing tip number 3 with black icing to line the shapes on the face. Whenever I use black icing I mix chocolate icing with black dye. Then I used round tip number 3 again with Royal Blue dye to create the eyes. After I piped the eye I wetted it down to make it smooth. Try to make a mixture of warm water and cornstarch. Then use your finger to push on their eye to smooth it out. After this I used the star tip number 16 for the rest of the face. I used the black, blue and gray icing. I made these colors with vanilla icing. I had purchased the transformers dye kit from Wilton, so I had the right dye colors. Finally, I had to fix up the white icing on the sides. I looked at all my tips and decided to use tip number 47. With the tip number 47 you can make a basket weave, stripes or a plain thick line. With the white icing I made white thick masculine strips around the outside that were horizontal strips. I was so relieved that it covered so nicely, completely covering the chocolate cake. To finish, I just had to slip out the wax paper from under the cake – this kept the base clean through the icing process.


I kept giggling while making this cake because I kept wondering which way was up. There are always some types of struggles when it comes to making cakes, or doing art. Just remember that it is always a process. It never turns out exactly as planned, but this way your creation is unique every time.
I think that the cake turned out well because my son and his friends were thrilled when they saw it. It made for unique conversations around different characters and their powers. It went really well with the ice cream bar and candy bar. If I were to do this again I would also have a side vanilla cake that was turned into the bumblebee character. The boys were thrilled and they and their friends truly enjoyed their Transformers cake.
